

What 192.168.18.1 Actually Is
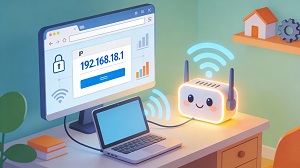 192.168.18.1 is a private IPv4 address used inside your local network, not a public website on the Internet. In many homes and small offices, it serves as the router’s default gateway, acting as the “front door” that all your devices use to reach the web.
When you type http://192.168.18.1 in a browser connected to your router, you are usually taken to the router’s admin login page where all configuration happens.
Logging in to 192.168.18.1
To reach the router settings page at 192.168.18.1, your phone, laptop, or tablet must be connected to that router via Wi‑Fi or Ethernet; mobile data or another Wi‑Fi will not work. Open a browser, type http://192.168.18.1 (or https://192.168.18.1 on some models) in the address bar, and press Enter to load the login screen.
Routers often ship with default usernames and passwords such as “admin/admin” or “admin/password,” which are printed on a sticker under the device, in the manual, or on your ISP’s support page. If defaults no longer work because they were changed, you may need to reset the router using the hardware reset button as described later.
Getting Around the Router Dashboard
After logging in at 192.168.18.1, you land on the router dashboard, which gives an overview of Internet status, LAN IPs, connected devices, and firmware version. From here you can adjust network options, wireless settings, firewall rules, and many other features that control how your network behaves.
Typical sections include:
- Status/Overview: Shows WAN IP, LAN IP (such as 192.168.18.1), connection type, firmware, and uptime.
- Network/LAN: Lets you change the router’s local IP, edit the DHCP range, assign static IP addresses, and specify DNS servers like Google DNS or Cloudflare.
- Wireless: Used to rename your Wi‑Fi (SSID), change the Wi‑Fi password, choose WPA2/WPA3 security, adjust channels, and enable a guest network.
- Security/Firewall: Allows you to enable the firewall, block IP or MAC addresses, enable parental controls, and restrict who can access the admin page.
- Advanced features: Often include port forwarding, DMZ, QoS (quality of service), VPN configuration, and system administration tools such as firmware upgrade, backup, and reboot.
Essential First Steps: Passwords and Wi‑Fi
One of the most important tasks after the first login is changing the router’s admin username and password so that nobody else on your network can easily alter settings. In the Administration or Management section, you can replace the default credentials with a strong passphrase that mixes letters, numbers, and symbols before saving the changes.
Securing your Wi‑Fi is just as important: in Wireless Settings, choose a clear SSID name, enable WPA2‑PSK or WPA3‑Personal, and set a strong Wi‑Fi password to keep neighbors or strangers from using your connection. When you apply new wireless settings, devices may briefly disconnect and you will need to reconnect using the updated network name and password.
Fixing Login Problems and Resets
If 192.168.18.1 will not open, first confirm that your device is on the correct network and that its IP is in the same subnet, such as 192.168.18.x. You can then check the actual default gateway with tools like ipconfig on Windows or routing commands on macOS/Linux, because some routers use a different address such as 192.168.0.1.
When the login page loads but your credentials fail, try another browser or private mode, clear the cache, and finally perform a hardware reset by holding the reset button for 10–30 seconds until the router restarts. After a factory reset, all custom settings (SSID, passwords, IP ranges) are wiped and you can log in again at 192.168.18.1 using the original default credentials on the label.
Helpful Advanced Options
Once the basics are in place, 192.168.18.1 gives you access to advanced configuration that can significantly improve performance and control. You can fine‑tune DHCP ranges and reservations, choose custom DNS servers, set up QoS to prioritize video calls and gaming, and configure port forwarding for CCTV, game consoles, or local servers.
Security‑minded users can enable MAC filtering, tweak firewall rules, disable risky features like WPS or unrestricted remote management, and set up isolated guest networks so visitors do not see internal devices. Businesses and power users may also configure VLANs, VPN endpoints, and logging or monitoring tools for better segmentation and visibility.
Best Practices for a Healthy Network
To keep your network running smoothly, update router firmware regularly, either through the Firmware Upgrade page or by enabling automatic updates if available. It also helps to reboot the router occasionally, back up configuration files before big changes, and document key information like IP ranges and passwords.
Monitoring the list of connected devices lets you spot unknown clients, assign static IPs to important hardware like printers or NAS devices, and quickly resolve IP conflicts by adjusting DHCP or manually assigning addresses. If you run into issues you cannot solve—such as a router that will not boot, failed firmware updates, or persistent connection problems—your ISP or the router manufacturer’s support team can walk you through more advanced recovery steps.
Quick Setup Checklist
- Change admin username and password at 192.168.18.1.
- Secure Wi‑Fi with WPA2/WPA3 and a strong passphrase.
- Adjust DHCP, DNS, and QoS to match your needs.
- Enable the firewall and disable unnecessary remote access features.
- Create a guest network for visitors and keep an eye on connected devices.